----
EASY-TO-MAKE
'A'-LINE SKIRT
MARKING AND CUTTING SCALLOPED POCKETS
Click here if you want patch pockets
|
Whilst every attempt has been made to ensure that the information on this site is accurate, no responsibility can be accepted for errors. You follow these instructions at your own risk. |
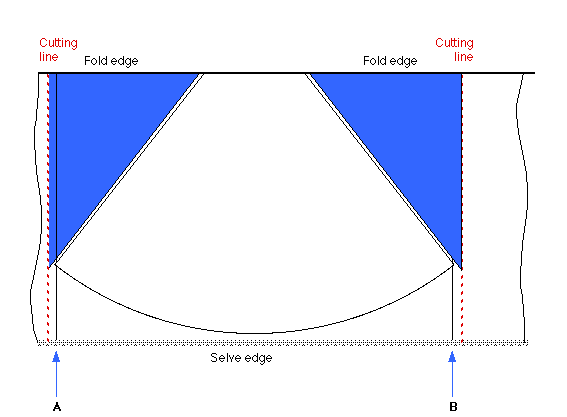
You should have two folded triangles which were put aside when you were cutting out the material.
 |
Turn over one of the triangles without unfolding it and place it on top of the other triangle, carefully aligning the folded edges. (If one triangle is smaller than the other, place the smaller one on top.) |
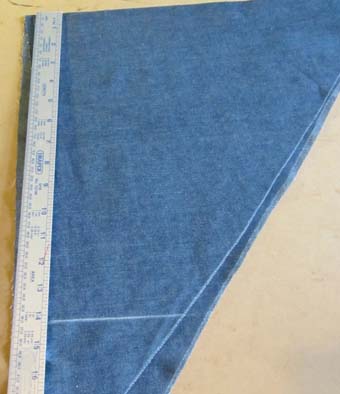 |
Mark a line parallel with the folded edge and 14" 36cm away from it. This line should be approximately 5" 13cm long. |
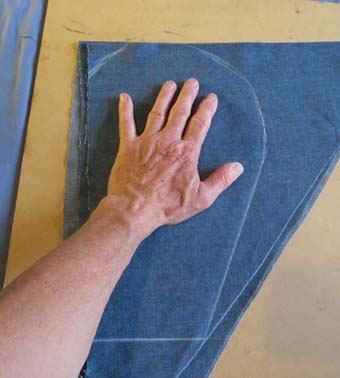 |
Pleace a spread hand on the material and draw around it with tailor's chalk to give the required pocket shape. Allow plenty of extra material for seams and the bulkiness of any objects which might be carried in the pocket. Leave a short section of the folded edge unmarked, so that it does not get cut.
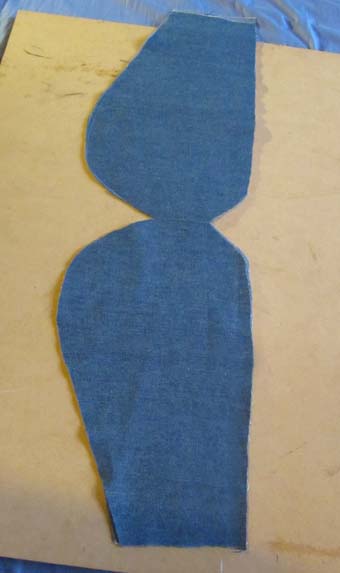
Making sure the folded edges are still aligned, cut around the marked-out shape through all four thickness of material, but do not cut completely through the folded edge. This will give the pieces for two pockets |
 |
You now have the pieces to make two pockets. Unfold them and identify the Right and the Wrong sides. |
 |
Place the unfolded pieces Wrong side to Wrong side and carefully align them.
|
|
How obvious do you want your pocket openings to be? |
|
|
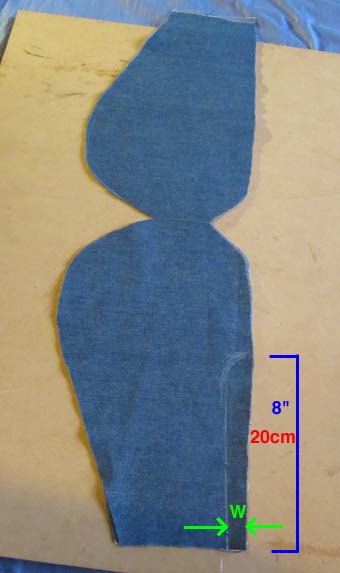
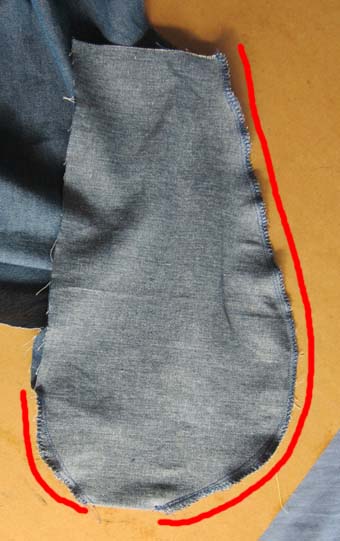
The length of the pocket opening is fixed at 8" 20cm but the width of the cut-out (shown in green as "W" in the photograph) will determine how obvious the pockets are. The picture on the left shows the marking for a very discreet pocket opening, the picture below shows the marking for a much bolder opening. 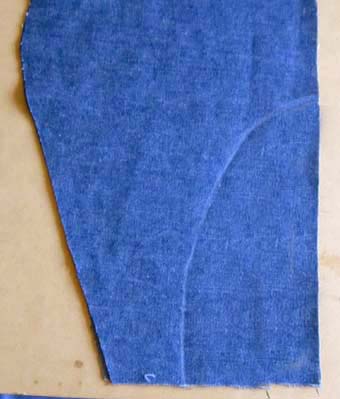
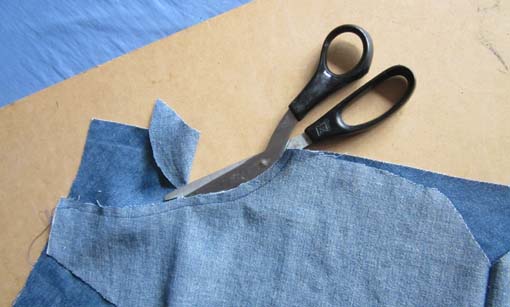
Mark out the required curve on only one of the pocket halves (as shown in the picture on the left), the other half of each pocket must not be marked. Check that the two pieces of material are still accurately aligned and carefully cut along the curve in both of them. |
 |
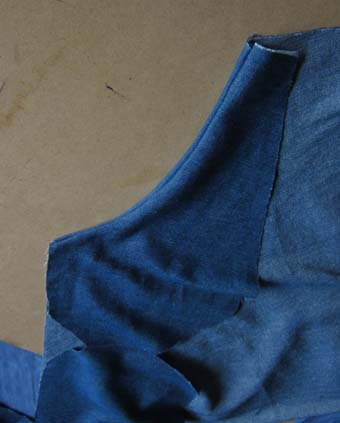
Separate the two pieces of material and re-fold each one Right side to Right side. They should now form two mirror-image pocket pieces which will be attached, one to each side of the front panel of the skirt. |
FITTING THE POCKETS

Choose one panel of the skirt to be the front and carefully put the other panel in a safe place so that you do not mix them up.
|
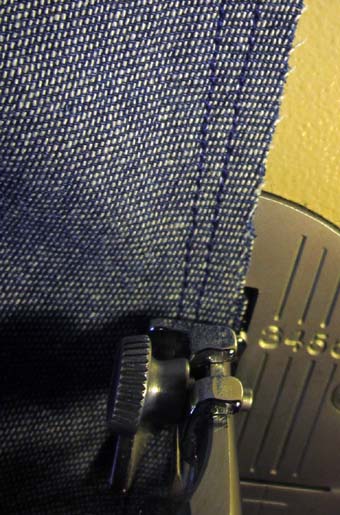
Note about locking sewing machine stitches: When beginning and ending a line of stitches, it is usual practice to reverse the machine feed and sew back over the end few stitches, so as to lock them in place and prevent them from unravelling. In this pattern it is often the case that one line of stitches is to be later crossed by another one, so the locking process is not necessary. When locking is required, the text will specify it, otherwise there is no need to do it. For all the straight stitching, except tacking, a setting of 12 to 15 stitches per inch 5 to 6 stitches per cm will give good results. For zig-zag stitching to prevent fraying, at least 15 stitches per inch 6 stitches per cm should be used. |
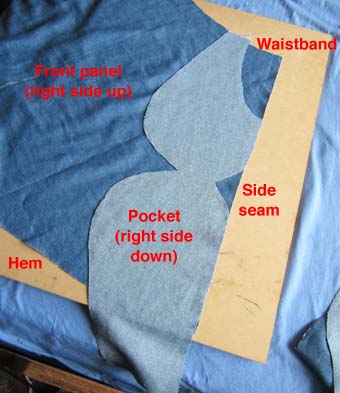 |
Lay out the front panel as shown with the Right side
uppermost. Lay out one of the pocket pieces onto the front
panel, Right side downwards. Match the edges as shown: (If you find the pocket will only match with the Right side upwards, try using the other pocket)
Mark the shape of the curved cut-out onto the front panel with tailor's chalk, then place the two panels in the sewing machine, taking care to keep them in the same orientation. |
|
|
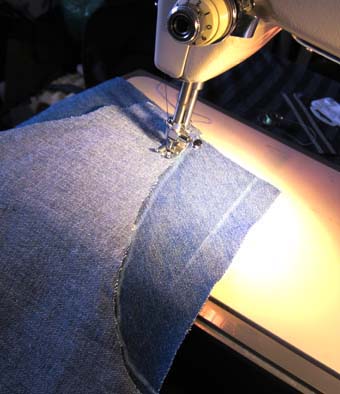
Stitch to pocket edge to the front panel with a line of stitches (about 12 per inch) about 1/4" 6mm from the edge of the curved cut-out, using the chalk mark on the front panel to keep them aligned.
|
 |
|
|
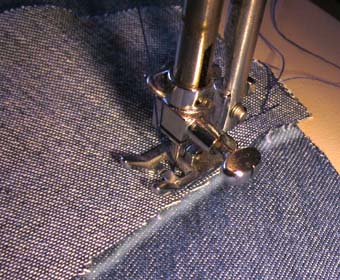
Cut away the surplus material from the front panel, following the pocket curve.
|
|
 |
Stitch a second row of stitches between the first row and the raw edge |
 |
Finally, finish off the raw edge with a line of zig-zag stitches to prevent fraying. |
 |
Turn the Wrong side of the pocket to the Wrong side of the front panel and check that the correct curve is produced for the pocket edge. |
 |
Press the inside of the curved edge firmly into the crease, so that the folded edges of both panels are sharply creased and equally prominent, then stitch the fold permanently in place with a straight stitch ( this will be on the Right side of the material). |
|
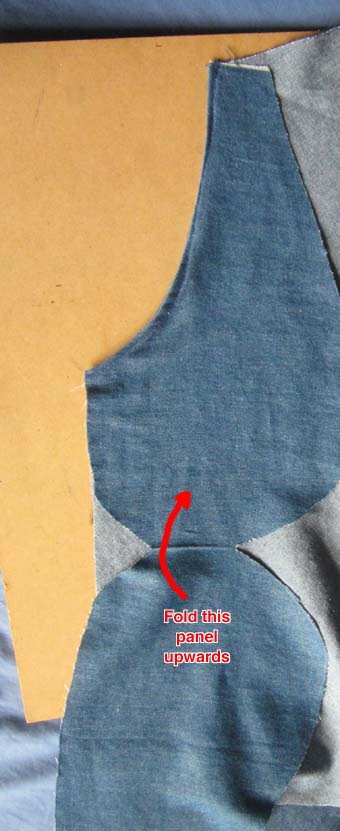
|
Fold up the other half of the pocket piece so that it aligns with the sewn-in half (Right side to Right side). |
 |
Stitch the two halves of the pocket together only along the edges indicated in red, being careful not to snag any other material.. Do not stitch the straight edges. At the end of each run of stitching nearest the fold, lock the stitches. As before, use a line of straight stitches about 1/4" from the edge, followed by a second line of straight stitches between the first line and the edge, followed by a line of zig-zag stitches to prevent the edge from fraying.
|
Repeat the whole sequence in mirror-image with the other pocket.
 |
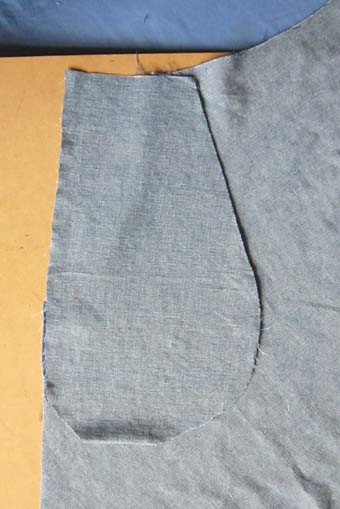
Lay out the front panel, Right side up and carefully smooth it out on the wooden board until the pockets lie flat. It is very important to make sure that everything is lying flat at this stage, otherwise the pockets may 'gape' or ruck up later. |
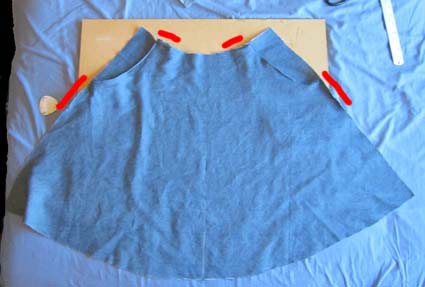 |
At the regions marked in red, there will be three thickness of material folded in a zig-zag formation, these need to be tacked together to avoid mistakes later on.
If you are confident enough, you can just pinch the layers in position with your fingers and hold them while you sew them, but you may prefer to cheat and pin them together or use a stapler to make sure they do not move while they are being sewn. Avoid hitting the staples with the needle.
Sew them together with straight wide-spaced stitching, starting and stopping with a few extra stitches each side of the thickened length. (Don't forget to remove the pins or staples afterwards.) It does not matter at this stage if the tops of the pockets stick out beyond the smooth curve of the waistband, this will be dealt with later.
Lay out the panel on the board and check that everything lies flat. If necessary, unpick the tacking and re-sew it to give a better result. |
THIS COMPLETES FITTING THE POCKETS TO THE FRONT PANEL
|
Do you want the zip in the side seam or at the front? |
|
|
|