----
EASY-TO-MAKE
'A'-LINE SKIRT
ADDING THE WAISTBAND TO A FRONT-ZIPPED SKIRT
|
Whilst every attempt has been made to ensure that the information on this site is accurate, no responsibility can be accepted for errors. You follow these instructions at your own risk. |
Throughout this section, the version of the skirt with scalloped pocket is used for illustration purposes, these zip instructions will work equally well with the patch pocket version.
You should have:
A complete skirt without a waistband and...

One waistband and...

some petersham already cut to length
SEWING ON THE WAISTBAND
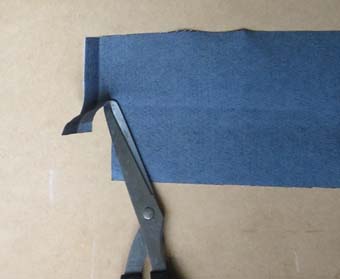 |
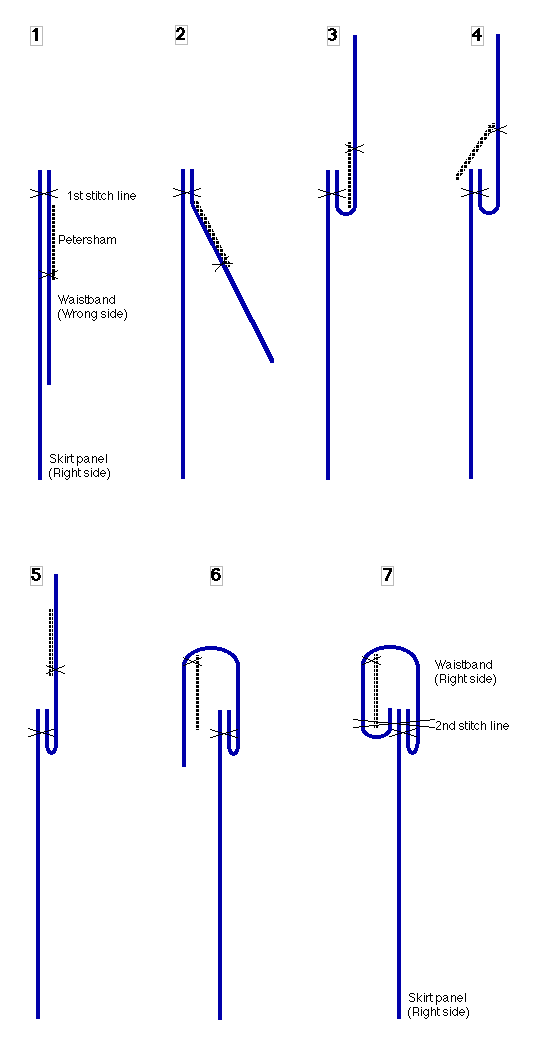
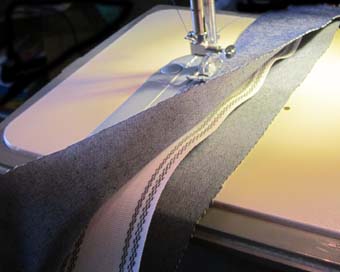
Cut the selve edge off one end of the waistband material.
Put the waistband material in the sewing machine, Right side down and fold over about 1/2" 12mm of the newly-cut end, Wrong side to Wrong side, and stitch it down. |
 |
Push the end of the petersham into the fold as far as it will go. |
|
|
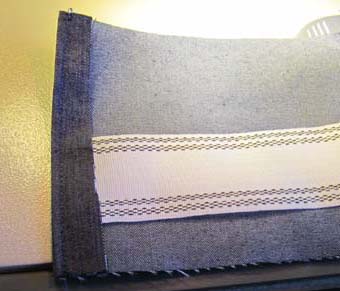
Fold the material exactly in half lengthways, carefully aligning the edges, then push the petersham into the fold. Stitch the folded edge to hold the petersham in place, but stop sewing 1/2" 12mm from the end of the petersham. |
|
|
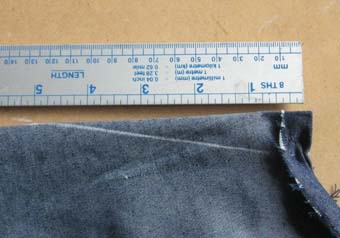
Mark the waistband 1/2" 12mm longer than the petersham and cut it to length. Fold over the newly-cut end, Wrong side to Wrong side, for about 1/2" 12mm and stitch it down; then push the end of the petersham into the fold as far as it will go. |
|
This is what you are trying to achieve:
|
|
|
|
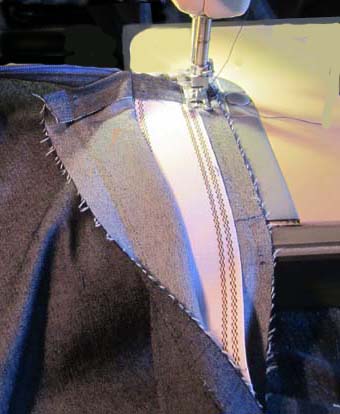
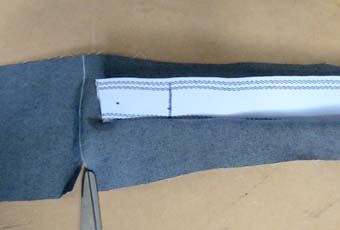
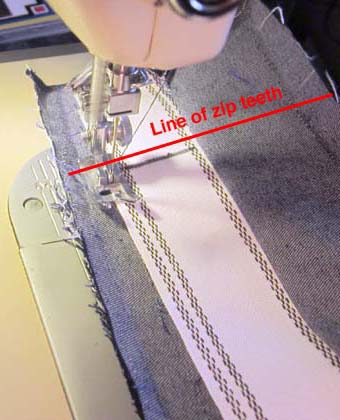
Place the front panel in the sewing machine, Right side upwards, with the zip open. The half of the zip which has the cover flap should be under the presser foot. Open up the waist band and lay it, Right side downwards, on top of the front panel so that the waist length mark is over the teeth of the zip and the long edge of it is aligned with the waistband edge of the panel. |
|
Begin with a few reverse stitches to lock the thread, then stitch the waistband to the front panel with a line of stitches just clear of the petersham (use the edge of the petersham as your guide). Make sure you keep the waistband material edge aligned with the waistband edge of the skirt panel at all times and avoid catching any stray folds of material in the stitching.
If a stitch accidentally catches the petersham, you must stop and remove that stitch. The line of stitching can then be continued after overlapping a few of the previous stitches.
As you come to a pocket edge [scalloped pockets only], check that the folds of material are lying correctly. Stop sewing about 1.5" 40mm before the centre chalk mark. |
|
 |
Now begin sewing-on the waistband from the other end. Align the free end of the waistband with the top of the remaining free side of the zip. Begin with a few reverse stitches to lock the thread, then sew the waistband to the centre line as before. Stop sewing about 1.5" 40mm before the centre mark. |
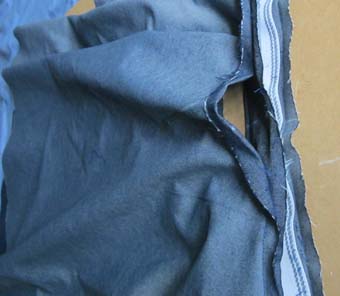 |
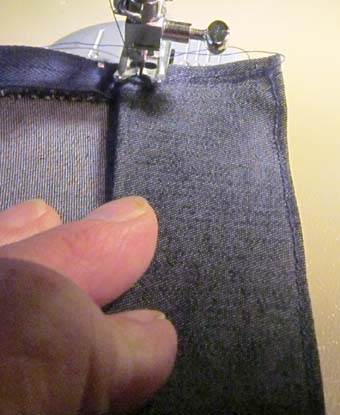
At this point, it will be apparent that the skirt material is longer than the waistband, this is because part of the curved waist edge of the skirt panels was cut across the grain of the fabric (known as "on the bias"), which makes it more stretchy. Turn the skirt inside-out. Pull out the surplus skirt material and turn down the waistband edge to match the already sewn-down portions, then pinch the surplus into a fold. Staple or pin the fold in place. This will form a 'dart' which will give some shape to the back panel. |
 |
Fold the skirt back panel in half along the line of the pinched fold, then chalk a diagonal line on the skirt from the staple or pin to a point about 5" 20cm from the waistband on the folded edge of the skirt panel. The long diagonal line shown is more suitable for a man's body shape, to fit a woman's shape, the line may be shortened a little and angled more steeply. Remove the staple and unfold the raw edge of the back panel whilst pinching the fold in place. Starting from the raw edge, sew a line of stitches down the diagonal line and run a few extra stitches off the folded edge. Draw the threads out from the machine before cutting them off, so as to leave long ends. |
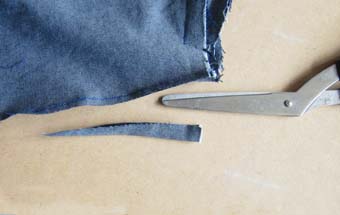 |
Before going any further, check that the dart has taken out the required length of material to remove any slackness in the back panel without pulling it too tight. If necessary, unpick it and make adjustments to the stitching line. When you are satisfied that the dart is correct, untwist the long ends of thread and tie them in a reef knot, then trim off the surplus. Sew a second line of stitches parallel with the first and about 1/8" 3mm nearer the folded edge. Cut off the folded triangle of material and zig-zag stitch the cut edges. |
|
|
|
|
|
|
|
|
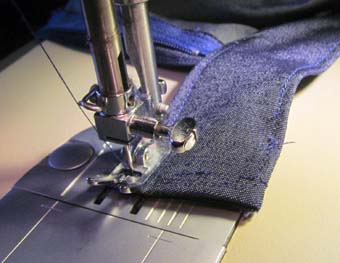
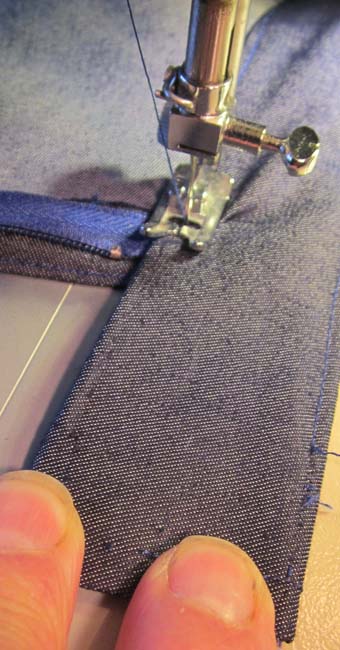
With the skirt inside-out, put the non-flap end of the waistband in the sewing machine in the orientation shown. Fold over the waistband and tuck the unsewn edge underneath the petersham as shown in the diagram below.
At every stage of the process, check that all raw edges are tucked in and no material is rucked up or accidentally caught by the stitches.
|
 |
|
 |
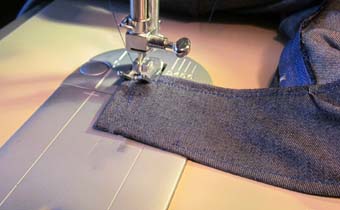
Sew backwards towards the top fold of the waistband, so as to lock the thread; then sew forwards to close the end of the waistband. |
 |
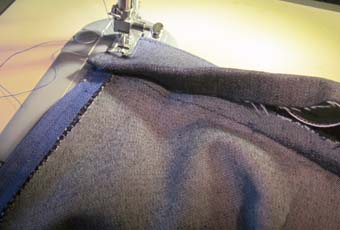
At the bottom corner of the waistband, stop the machine with the needle down, raise the presser foot and turn the material clockwise on the needle to the orientation shown.
Lower the presser foot and continue sewing the edge of the waistband to the panel. |
|
|
Continue sewing along the entire length of the waistband. Pause before sewing the flap and check that all folds and raw edges are correctly tucked in. |
 |
Continue sewing to the corner of the flap. |
 |
Turn the material clockwise on the needle (as previously) and sew to the top corner of the waisband. Continue sewing along the top edge of the waistband until you have overlapped the previous stitching by about 1/2" 12mm. |
THIS COMPLETES FITTING THE WAISTBAND
Next you need to turn the hem